I’m writing this as notes to self really, as I’ve developed a new workflow that seems to work OK, and I’ll forget it if I don’t write it down. It may be of interest to others, and please comment if you think anything can be made simpler.
The topic is… how to manage all the photos we take with camera and phone, and how to share these with family and friends (but not the whole world).
Facebook or Instagram, Flickr or Picasa, surely!? Umm, no actually we use the free version of Gallery Server (“GS”) to share photos and videos with family and friends (requiring a log in) and to share certain categories of photos with anyone (e.g. from the Pen y Fan Race).

This post is not the place to discuss the reasons why, but essentially it’s about retaining control and minimising overall costs. We run Gallery Server on cheap but decent hosting from Arvixe, using their personal class ASP.Net hosting package. This offers unlimited storage space and data transfer, plus “full trust” ASP.Net hosting, which is good for GS.

It’s important to state that we are using GS and Arvixe for publishing selected photos, and not as the primary repository of the originals – that really determines the workflow here. If we were simply pushing every photo onto Arvixe/GS and publishing the lot then things would be much simpler, but the bandwidth requirements for the upload and the time taken would be more than our current internet connection can bear (no fibre yet).
So our primary repository is on a NAS drive on the home ethernet network, specifically a Netgear ReadyNAS Duo v2 with a couple of TB drives in RAID5 configuration (for resilience). These files are in turn backed up every night to an older Netgear ReadyNAS Duo (v1) that used to have the same disk arrangement until one went pop, so no RAID any more!
So first we need to get the photos into the primary repository.
Cameras with memory cards
Plug the SD card into the main PC and copy the files into the relevant year/month folder on the NAS drive, e.g. P:\FlowerPhotos\2015\08-August (we always create a new folder for each month in the format nn-monthname which is readable and sorts correctly).
Phone
Let the phone sync the photos to OneDrive, which then syncs them automatically to the main PC > copy the files to the folders mentioned above.
Cataloguing
We use ThumbsPlus v10 to catalogue and view photos within the home network. Although this app has gone through some turbulent times since the upgrade from the excellent version 7, it’s still a useful tool with some strong points, in particular the ability to add custom attributes for files and batch process selections with custom processing steps. We make use of both of those facilities in this workflow.

In ThumbsPlus we scan the folder(s) where the new files have been added to make thumbnails (catalogue entries). Then we whizz through them “tagging” the ones we want to make visible to others (this is a single keystroke while viewing each image, so very simple). We might also delete the no-hopers at this stage. When we’ve reviewed the folder, we select all the tagged thumbnails in the folder (Edit > Select by > Tagged) and add a more permanent attribute, Ctrl+U to “assign user fields” for the selected images, then enter “Y” into the “ForWeb” attribute (this adds the value to all the selected files at once). Repeat for any other folders involved.
Then we pull together all the files that have been flagged as ForWeb=Y with a “Found files” query (one of ThumbsPlus’ many items of bizarre nomenclature), designed as shown and stored/named as “FlowerPhotosForWeb”:
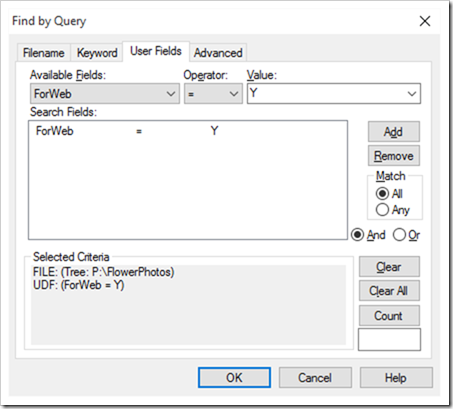
To refresh the list in this query we just right-click on it and “Requery Now”.
Then we select all files (Ctrl+A), then we run a batch process to resize the images to not more 1024x1024 and drop them out into a new folder structure mirroring the original, but ready for uploading to the web server. The steps in the batch process are as follows:
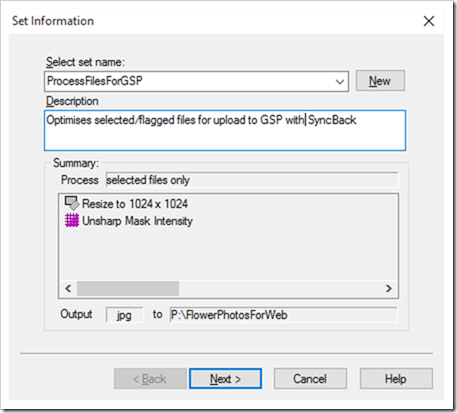
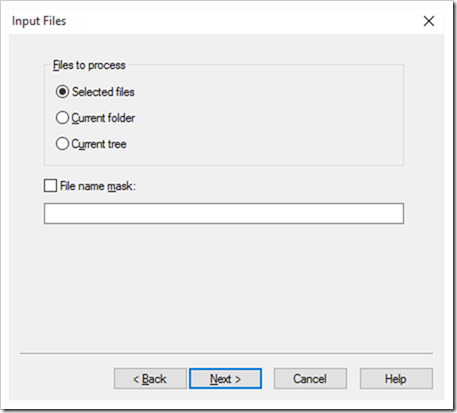
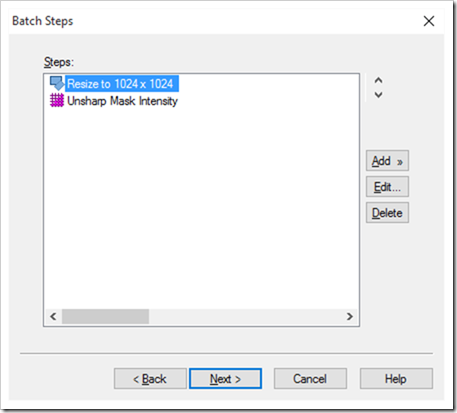
and the first batch step in detail (choosing the “Downsample” interpolation is really important as the others give poor results):
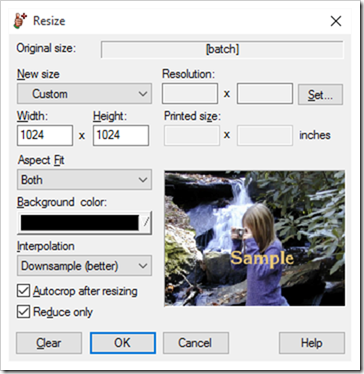
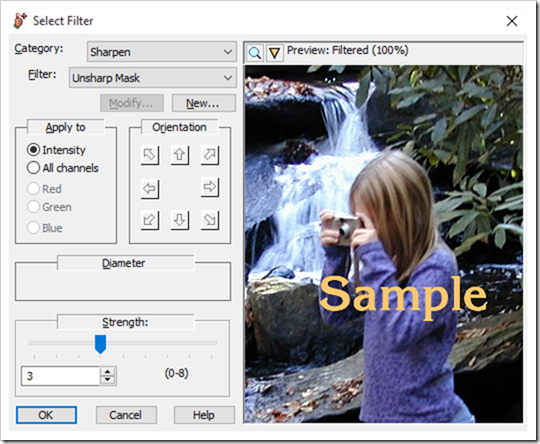
and the second batch step:
and the output options (including choosing 90% JPEG quality):
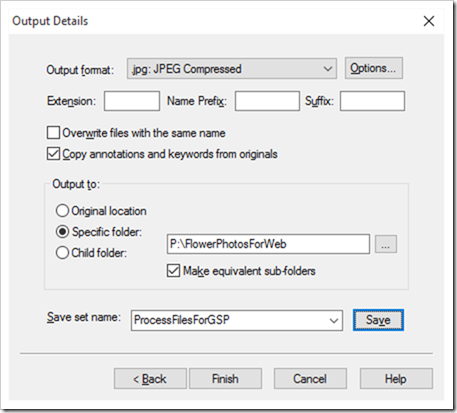
This takes a few seconds/ minutes to run depending on how many new images have been added (it doesn’t re-process any that are already in the output folder unless the “Overwrite files with the same name” option is ticked on the last screen above. We find that the original folder structure with the year/month folders is preserved below the output path above, but containing only the selected images at the appropriate size.
The manual work has now finished, and the rest will happen all by itself, though it’s possible to push it along quicker in various ways if needed.
Moving the files to the web server is achieved with SyncBack Free, which, as the makers say, is the “best free Windows backup program on the planet”. It’s necessary to create a “profile”, and make lots of decisions for this profile, like where it should work from and to, when it should run, etc. In my case, it’s doing a simply backup from my P:\FlowerPhotosForWeb\FlowerPhotos to the FTP address of my hosting account, and putting the files into the “gs\mediafiles\family photos” subfolder below the GS web site folder. The “backup” setting ensures that any files that are in the source but not the destination, or any files that have changed at the source, are copied to the destination. Any files that are in the destination but not the source are left in place (which might happen if we add files to GS by other means). The finished article looks like this:
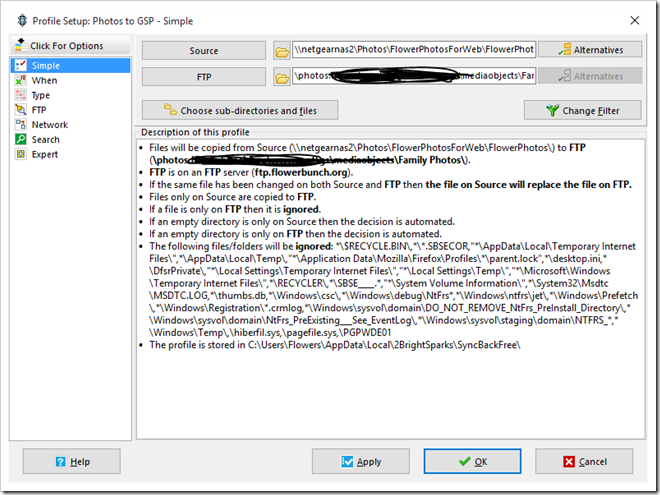
With SyncBack we can either let a profile run on a schedule, or run it interactively – I have this scheduled to run every evening. I should say at this point that a year or so ago I had Arvixe admins emailing me saying I wasn’t allowed to use their hosting as a backup service, as they had detected automated FTP file transfers and too much storage use within my account. I replied that I was not using their service for backup purposes, but simply to populate family photo albums efficiently, and asked them to clarify what aspect of “unlimited storage” I was infringing, and they went silent. Material for another post here methinks.
So now the files are on the web server, there’s one more step to make them appear to friends and family… GSP needs to “synchronise” in order to recognize and process the new files. As with SyncBack, this can be done manually (Actions > Synchronize), or automatically (Site admin > Albums > General > Synchronization). Ours is set to synchronize once per day.
Because we’ve resized the images before uploading them to GS, we can ensure that no further processing/re-sampling is done by tuning the settings. GS will always create thumbnails of chosen size for each media object, but will also create optimised/reduced versions of each file if settings dictate, either keeping or discarding the original as you wish. In our case we don’t want it to create a new optimised version, unless we use some other workflow to load out-of-camera large files. The resized image files generated above are normally 2-500KB, and not more than 1024 pixels in either dimension, so we set the following in Site admin > Media objects > Images:

Once this synchronization has run, any new photos appear in the gallery. This can mean that an image takes a couple of days to get from camera or phone to the website, and there is a manual filtering process needed that takes a minute or two for a folder of images. If we want to speed things up, the SyncBack and GS process can both be initiated manually instead of waiting for them to run automatically, so overall this workflow seems OK, but we are always looking to improve, and the clunky bit to me is currently the ThumbsPlus part.